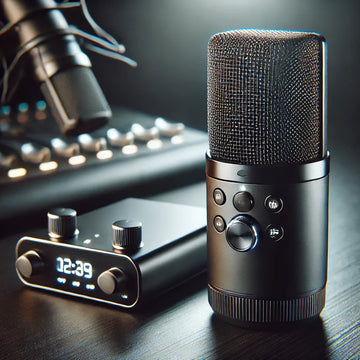
Wireless microphone makes it very helpful in daily life. Now in modern age it's very useful in different places like in public speaking time podcast performance ,speeches and other event it become a essential part . They provide different greater mobility , estimate cable clutter, and other beneficial things or professional reliability.
However setting is a biggest problem many people face in correctly setting it to ensure clear audio quality and stable performance without interference. In this blog I will try to give you information step by step about every process. We will also try to cover troubleshooting tips, best practice and key consideration for optimization.
Understanding Wireless Microphone Systems
A wireless microphone consists of two primary components:
Wireless Microphone (Transmitter)
Receiver
Wireless Microphone (Transmitter)
Capture sound and transmit its audio and sound waves wireless in the air .
Receiver
It picks up the sound and transmits it into the amplifier , mixer , speaker system.
The microphone and receiver must be tuned to the same frequency to work correctly. Let’s explore different methods to connect them.
Step by step wireless microphones guide line
1. Check compatibility between microphone and receiver
2. Power on devices
3. Set and sync the frequences
4. Connect the receiver to an audio system
5. Perform a sound check
Step no.1
Check compatibility between microphone and receiver
Before attempting to connect the device of your wireless microphone to a receiver and user approach, ensure that the two devices are compatible and reliable for use.
Check frequency range
For checking the frequency range of your microphone make sure that, both the microphone and receiver must operate on the same frequency band and range, which can be found on product labels and manuals terms.
Analog vs digital signal
For checking out the analog vs digital signal .Ensure both components use the same type of transmission to avoid signal issues.
Step no .2
Power on device
Insert Batteries into the Wireless Microphone
Most wireless microphones use different types of elements like AA or rechargeable lithium-ion batteries. Which make themensure that they are fully charged or fresh for using purpose.
Turn on the receiver
Plug the receiver device into a power source like a charging device and turn it on or activate it.
Step no .3
Set and sync the frequency
For the microphone to communicate with the receiver and device user, make sure it , both must be tuned to the same frequency. Which makes your voice note related to your wants and needs.
Automatic frequence sync (for modern systems)
Many modern systems provide the facility of an auto-sync button. Press it on both the microphone and receiver, and they will pair automatically to the device.
Manual frequence sync (for older system)
Find the frequency selection menu on the receiver.
Choose a frequency that is not already in use to prevent interference.
Set the same frequency on the microphone.
Confirm the connection by checking the signal strength indicator on the receiver device.
Step no .4
Connect the receiver to an audio system
Once the microphone and receiver are paired together and after its connection, the next step is to send the audio signal to your sound system and get sound waves according to your preference.
Use the Right Cables:
XLR Cable – Recommended for professional setups and using the right cable device can make more professional performance capability; connect the XLR output from the receiver to your mixer or amplifier microphone wireless speaker.
1/4-inch Audio Jack (TRS Cable) – Some receivers offer 1/4-inch outputs for direct connection to speakers or other audio equipment that increase its reliability and surety.
Plug into an Amplifier or Speaker System:
Connect the receiver output to an audio mixer speaker system , PA system, or amplified speaker.
Adjust the gain and volume settings accordingly to your preferences.
Step no .5
Perform a sound check
For checking performance of sound reliability you should see that’s following steps;
Monitoring
Speaking or singing into the microphone while monitoring the receiver and can give you idea about your sound reliability and performance satisfaction.
Adjust the volume levels
Use the gain controls on the receiver performance and reliability or mixer to prevent distortion.
Check for inference
Walk around the venue to ensure that the signal remains stable and clear for sounding waves.
Use High-Quality Batteries
Keep Devices Updated
Choose the Right Frequency Band
Proper Placement
Regular maintaince
Use high quality betteries;
Using a high-quality battery in a microphone can work very useful in its life and working capability, whether it's a wireless microphone, condenser mic with phantom power, or a battery-powered dynamic mic, offers several advantages those make it must reliable as followings:
Longer bettery life
High-quality batteries (e.g., lithium or high-capacity alkaline) provide extended usage time maximum performance reliability, reducing frequent replacements and error which occur during sound receiving.
Especially important for live performances like in presenter and stage performance, broadcasting, and long recording sessions in interview types terms.
Consistent Power Supply
Ensures stable voltage volume, preventing dropouts, static noise, or audio distortions .
Helps maintain a clear, strong signal in wireless microphones and provides sound waves.
Improved Performance
Reduces interference and signal degradation purpose, particularly in wireless systems in many microphone system.
Ensures proper functioning of condenser mics requiring phantom power or battery operation for best performance .
Reliability in Critical Situations
Avoids unexpected error in situation like power loss during live performances, presentations, or recordings.
Rechargeable high-capacity batteries (like NiMH or lithium-ion) are better suited for professional use and long lasting timing capabilities.
Cost-Effective in the Long Run
While high-quality batteries may be expensive upfront things , they last longer and reduce frequent replacements of storage , saving money over time are equally advantages.
Keep device updated
Firmware Update for Wireless/Digital Microphones
Many modern wireless microphones or USB microphones come in markets with different firmware that can be updated to improve performance, fix bugs, or add new features of digital device.
Steps to Update Firmware:
- Check the Manufacturer's Website of devices :
o Visit the official website of the microphone brand that make sure its working gurantee(e.g., Shure, Sennheiser, Rode, Audio-Technica).
o Look for the "Support" or "Downloads" section to find the firmware updates.
2. Download the Firmware & Software
o Most manufacturers provide a large and authentic firmware update tool along with the firmware file.
o Download both and install it into the software on your computer.
3. Connect Your Microphone to the Computer
o If it's a USB microphone but that not for a wireless microphone, use a USB cable port.
o If it's a wireless system microphone, some brands require a special docking station or USB receiver to update the communication protocol.
4. Run the Firmware Update Software
o Open the update software and follow the on-screen instructions which help you to control it performance and manageability.
o Some devices may require putting the microphone into "update mode" before proceeding for activating purposes and another system purpose.
5. Complete the Update
o The software will install the new firmware of microphone, and the microphone may reboot automatically the instruction of software which provide it to follow and perform it.
o Disconnect and test the microphone to ensure everything is working correctly without any error which can make badness for your performance are must to removed it.
2. Updating a Microphone on a Computer (Driver Update)
If your microphone is connected to a PC or Mac, updating drivers can enhance performance and its credibility but its altera voltage and reliability effectiveness.
For Windows:
1. Open Device Manager (Press Win + X and select "Device Manager").
2. Locate "Sound, Video and Game Controllers" and find your microphone performance capability .
3. Right-click the microphone and choose "Update driver" > "Search automatically for drivers".
4. Following the prompts and restarting your computer if you needed it.
For macOS:
1. Go to System Settings > Sound and check for microphone updates in Software Update.
2. If the microphone has special software (like Rode Connect or Blue Sherpa), update it from the app and according to its given instruction .
3. Updating Wireless Microphone Systems
Some professional wireless microphones (like bluks Shure or Sennheiser) require a base station update and purpose of wireless microphone.
1. Check compatibility – Ensure the receiver and transmitter are compatible with the latest firmware and modern age performance.
2. Connect the receiver to a computer via USB or Ethernet.
3. Use manufacturer software to check for updates and install them.
4. Sync the transmitter (handheld or bodypack) with the updated receiver.
Why Update Your Microphone?
Fixes bugs and improves stability for error removal.
Adds new features and optimizations themes for greater performance.
Enhances compatibility with newer systems and modern age.
Improves battery efficiency in wireless models and also its effectiveness.