


Choosing the Right Tripod for Your Equipment
Choosing the right tripod for your camera setup might seem like a small decision, but it can make a huge difference in the quality and ease of your photography or videography. The first thing to keep in mind is the size and weight of your gear. If you’re working with a heavy DSLR, you’ll need a tripod that’s sturdy and built to handle the load.
On the other hand, if you're just using a phone or a compact camera, a lightweight, more portable tripod will do the job just fine. Materials matter too. Aluminum tripods are common and usually budget-friendly, offering solid durability. But if you travel a lot or shoot outdoors frequently, a carbon fiber tripod is worth the investment. It's lighter to carry around and still strong enough for most purposes.
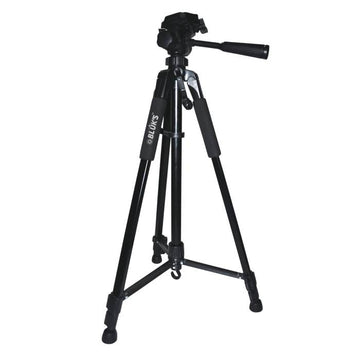
Understanding the Tripod parts
When browsing tripods, don’t overlook the smaller features like adjustable height, leg locks, and the grip on the feet. These details can make all the difference when you’re shooting on uneven ground. And always double-check that your tripod is compatible with your camera—especially the mounting system—so you’re not stuck with gear that doesn’t fit your shooting style.
Understanding how a tripod works helps get smoother shots and protect your equipment. The legs are the backbone, usually made from either carbon fiber or aluminum, and they can be extended or collapsed based on how high or low you want to shoot. The leg locks are there to keep the height secure, so be sure they’re fastened properly. Then there’s the tripod head—the part that actually holds your camera.
There are a few different types: ball heads give you quick flexibility, while pan-tilt heads allow more precise control. You’ll also come across something called a quick release plate. This tiny part might seem insignificant, but it’s really useful—it attaches to the bottom of your camera and makes it easy to snap the camera on and off the tripod without having to screw and unscrew it every time.
Finding a Stable Surface for Setup
Setting up on a solid surface is just as important as having a quality tripod. Even the most expensive tripod won’t do much if it's resting on wobbly or slippery ground. Look for stable spots like hardwood floors, concrete, or firm ground.
If you're outside, avoid areas with sand, mud, or jagged rocks—unless your tripod has adjustable leg angles and specialized feet that can grip the terrain. And don’t forget to use your tripod’s built-in bubble level (or a leveling app on your phone) to make sure everything is even.
Extending the Legs Correctly
There’s a method to extend the tripod legs. Always start by extending the thicker, top sections of the legs first. These are more stable and less likely to wobble under the weight of your camera. The thinner bottom sections should only be used when you need the extra height. Extending from the bottom up might seem quicker, but it can make the whole setup less stable—especially on uneven ground.
Leveling Your Tripod for Balanced Shots
Leveling your tripod properly might seem like an extra step, but it really pays off. Once your legs are in position and you’ve got a stable surface, use the level to fine-tune things. Adjust each leg until the tripod head is completely flat. This is especially important if you're taking panoramic shots or doing any kind of architectural photography, where even a slight tilt can throw off the whole frame.
Securing the Camera with a Quick Release Plate
Once everything is leveled, it’s time to secure your camera. The quick-release plate comes into play here again. Attach it to the bottom of your camera using a coin or the screw knob, making sure it’s nice and tight. Then slide or snap it into place on the tripod head until it locks. Give it a quick tug to double-check it’s secure—better safe than sorry. This connection is crucial because even a slight looseness can cause blurring or, worse, a dropped camera.
Adjusting the Tripod Head for the Desired Angle
With your camera locked in, the next step is to set your angle. Depending on the type of tripod head, you can rotate, tilt, or pan the camera to frame your shot just right. Ball heads offer fast adjustments, while pan-tilt heads are great for fine-tuning. Once you’ve got the angle you want, tighten everything down so it stays in place throughout the shoot.
Using a Remote Shutter or Timer to Avoid Shake
Now here’s a tip that many beginners miss: avoid pressing the shutter button directly. Even that small movement can introduce shake and blur. Instead, use a remote shutter release if you have one, or simply set your camera’s timer. That way, the shot is taken a couple of seconds after you press the button, giving everything a chance to settle.
Adding Extra Weight for Windy Conditions
If you're shooting outdoors and there's wind—or even just a breeze—consider adding some weight to your tripod to keep it grounded. A lot of tripods have a hook under the center column for this exact reason. You can hang a sandbag, your camera bag, or anything heavy enough to stabilize the setup. Combined with using a remote or timer, this can make a big difference in the sharpness of your photos.
Tripod Safety Tips: Avoiding Falls and Damage
Lastly, always keep safety in mind. Before mounting your camera, make sure the tripod is standing on a level and stable surface. Check that all the leg locks are fully engaged, and try to keep the center of gravity low—especially when using long lenses or shooting in windy areas.
Never leave your camera unattended on the tripod, and when you’re done shooting, collapse the legs properly so it’s easier and safer to carry. These simple habits can save your gear from damage and make your overall shooting experience a lot smoother.
