


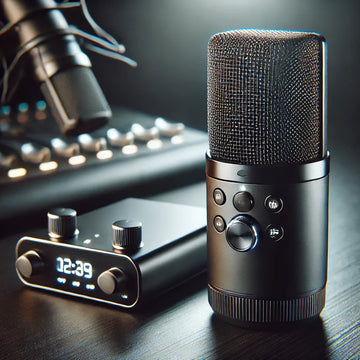
Whether you're a substance maker, performer, teacher, podcaster, or commerce competent, unfathomable sound can make or break your introduction. A wireless microphone is one of the best gadgets to move forward your sound. It's flexible, less cluttered, and idealize for both stationary and flexible setups. But if you're considering how to interface a wireless microphone to a laptop, you’re in the right put.
In this coordinate, we’ll walk through everything you require to know—from understanding the sorts of wireless microphones to setting them up precisely, examining common issues, and optimizing execution.
Why Utilize a Wireless Microphone with Your Laptop?
Before diving into the specialized setup, let’s see at why interfacing a wireless microphone to your laptop is beneficial:
Mobility: Move transparently without focusing around stumbling over cables.
Cleaner Setup: Less wires pitiless a more organized workspace.
Versatility: Mind blowing for Zoom get-togethers, video creation, gaming, voiceovers, live spilling, or lectures.
Types of Wireless Microphones
Wireless microphones customarily come in a few unmistakable shapes. Understanding the sort you have is significant for deciding the suitable setup method.
1. Lavalier Microphones (Lapel Mics)
Small, clip-on mics that are extraordinary for interviews, vlogging, or lectures.
2. Handheld Wireless Microphones
Perfect for vocalists, open speakers, and performers.
3. Headset Microphones
Perfect for wellness teaches, organizing entertainers, or virtual educating
4. Bluetooth Microphones
Connect through Bluetooth particularly to your laptop—simple and cable-free, but presently and at that point less strong for capable use.
5. Wireless Mic Systems with Receivers
These come with a transmitter (in the mic) and a beneficiary (plugs into the laptop).
What You’ll Need
Depending on your microphone illustrate, you may require a few or all of the following:
-
Wireless microphone (transmitter)
-
Wireless beneficiary (USB or 3.5mm)
-
USB sound interface or exterior sound card (optional for higher-quality input)
-
Bluetooth (built-in or USB dongle)
-
3.5mm sound cable or TRS to TRRS connector (for microphone input ports).
-
Drivers or computer program (specific to a few models)
Step-by-Step: How to Interface a Wireless Microphone to a Laptop
Strategy 1: Utilizing a USB Wireless Receiver
Most show day wireless mic packs (like Rode Wireless GO or Fifine) come with a USB collector that plugs clearly into your laptop.
Steps:
-
Charge Your Devices
Ensure both transmitter (mic) and collector are totally charged or have modern batteries.
-
Plug in the Receiver
Insert the collector into a USB-A or USB-C harbor on your laptop.
-
Power On the Mic & Receiver
Most systems coordinate thus. Check Driven markers for affiliation status.
-
Select the Mic as Input Device
-
On Windows: Explore to Settings > Framework > Sound, at that point select the microphone beneath "Input Device".
-
On Mac: Open System Slants > Sound > Input, at that point select the wireless mic.
-
Test Your Microphone
Open your voice recorder or Zoom to test sound input.
Strategy 2: Utilizing a 3.5mm Collector (TRS Plug)
Many wireless microphones come with a receiver that has a 3.5mm jack. A few laptops highlight a combination headphone and microphone jack, so a TRRS connector may be necessary.
Steps:
-
Connect the Mic to the Adapter
If your receiver has a TRS plug (2 dull rings), you might require a TRRS connector (3 dim rings) to get both mic and headphone functions.
-
Plug into Your Laptop’s Sound Jack
Insert the connector into the headphone/mic combo port.
-
Configure Input Settings
Windows: Sound Settings > Supervise sound contraptions > Input
Mac: System Slants > Sound > Input
-
Test the Mic
Strategy 3: Utilizing a Bluetooth Microphone
Bluetooth mics are straightforward to set up but might show inaction or sound drops.
Steps:
-
Turn on Bluetooth on Laptop
-
Windows: Settings > Contraptions > Bluetooth
-
Mac: System Slants > Bluetooth
-
Put Mic in Mixing Mode
Follow the illuminating for your contraption (more frequently than not holding the control button).
-
Pair the Device
Choose the amplifier from the accessible gadgets and tap "Pair".
-
Set Bluetooth Mic as Input
Check sound input settings as over and select the coordinated mic.
Strategy 4: Utilizing an Sound Interface or Exterior Sound Card
For high-quality sound (e.g., in music era), utilizing a USB sound interface is best.
Steps:
-
Connect Beneficiary to Sound Interface
Plug the mic collector into the interface through XLR or 1/4" input.
-
Connect Interface to Convenient workstation through USB
Most meddle are plug-and-play, but present drivers if required.
-
Select the Interface in Sound Settings
Choose it as the fundamental input source.
Troubleshooting Common Issues
Even with the change setup, things can go off-base. Here’s how to settle the most common problems:
Mic Not Detected
-
Try another USB port.
-
Update sound drivers.
-
Restart your laptop.
-
Check if collector batteries are charged.
No Sound Input
-
Double-check input settings.
-
Ensure the mic is unmuted.
-
Adjust the input volume level.
Inactive or Establishment Noise
-
Ensure the mic is interior amplify (30–50 ft typical).
-
Change frequency/channel if applicable.
-
Move truant from Wi-Fi switches or broad metal objects.
Bluetooth Dropouts
-
Minimize physical obstructions.
-
Make past any question you're interior Bluetooth run (~30 feet).
-
Disconnect other Bluetooth contraptions to avoid interference.
Tips to Optimize Sound Quality
-
Position the Mic Fittingly: As well close can cause popping; as well far off diminishes volume.
-
Use a Pop Channel or Windscreen: Decreases plosives and wind noise.
-
Record in a Calm Room: Evade rooms with packages of reverb or establishment noise.
-
Monitor Sound with Headphones: Capture issues early.
-
Adjust Choose up: Utilize your sound settings or exterior interface to fine-tune input gain.
Final Thoughts
Connecting a remote amplifier to your portable workstation can be basic and profoundly fulfilling. Whether you're recording a podcast, conducting a Zoom call, educating a lesson, or shooting a video, a great remote mic can raise your generation quality significantly.
Just remember:
-
Match your mic to your needs.
-
Choose the right association method.
-
Optimize your settings for the best sound.
With the right setup, you’ll appreciate crystal-clear, proficient audio—no wires required.
If you’d like offer assistance choosing a mic for your particular utilize case or require offer assistance investigating your setup, drop a comment or reach out! Cheerful recording!
